Three.jsでfbxファイルを読み込み、3Dアニメーションをする
- 2021.11.15
- 01_技術ブログ Three.js
- #Javascript

こんにちは!
プログラム学習中のdynaです。
この記事は、
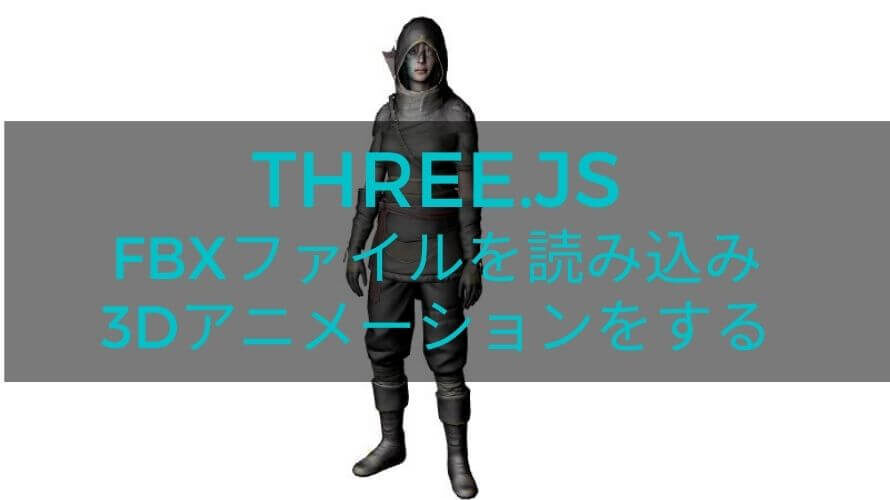
Three.jsを使用して、.fbx拡張子のファイルを読み込み、WEBブラウザ上でアニメーションを再現
する記事です。
3Dモデルは mixamo を使用させていただいてます。
デモ動画↓
デモページはボタンリンクより↓
※読み込みに少し時間がかかります(5秒~)。
読み込まれない時は、ブラウザで開いてみてね。
★立ち上がる忍者↓
★女の人キック↓
今回使用したのは、
・three.js
・ three.js の FBXLoader(.fbxファイルを読み込む)
・ three.js の OrbitControls(マウスで画面をコントロールする)
です。
今までのthree.js関連の記事はカテゴリーの「three.js」にあります。以下抜粋↓
★glbを読み込む
★three.jsで頂点で形を作成
では表示の仕方を見ていってみましょう!

表示までの考え方
考え方は以下です。
★three.jsでシーン・カメラ・コントローラー・光源・レンダラーを設定する
★3Dモデルを、FBXLoaderを使って読み込み、シーンに追加する
⇒ここで、AnimationMixerを使用してアニメーションを調整、再生設定する
★アニメーションを更新し、レンダラーを呼び出す
★HTML上に追加する
最後に全体を載せているので、全体のコードを見たい方は「全体のコード」をご覧ください。
では各項目ずつコードを見ていきます。
three.jsでシーン・カメラ・コントローラー・光源・レンダラーを設定する
まずはthree.jsを読み込みます。
初期の導入についてはこちらをご覧ください。
今回はCDNを利用させてもらいます。
HTML↓
1 2 3 4 5 6 | <body> <!-- Output --> <div id="WebGL-output"> </div> |
three.jsと今回必要な FBXLoader 、 OrbitControls を読み込みます。
1 2 3 4 5 6 7 8 9 | <!-- Javascript code--> <script type="module"> import * as THREE from'https://unpkg.com/three@0.126.1/build/three.module.js'; import { OrbitControls } from 'https://unpkg.com/three@0.126.1/examples/jsm/controls/OrbitControls.js'; import { FBXLoader } from 'https://unpkg.com/three@0.126.1/examples/jsm/loaders/FBXLoader.js'; //以下★2に続く |
シーン・カメラ・レンダラー・光源・コントローラーを設定します。
1 2 3 4 5 6 7 8 9 10 11 12 13 14 15 16 17 18 19 20 21 22 23 24 25 26 27 28 29 30 31 32 33 34 35 36 37 38 39 40 41 42 43 44 45 46 47 48 49 50 51 | //★2続き let camera; let scene; let renderer; let clock = new THREE.Clock(); let mixer; init(); // 読み込み function init() { //シーン scene = new THREE.Scene(); //中心線の追加 scene.add(new THREE.AxesHelper(5)) //カメラの作成 camera = new THREE.PerspectiveCamera(45, window.innerWidth / window.innerHeight, 0.1, 5000); //カメラセット camera.position.x = 200; camera.position.y = 300; camera.position.z = 500; //原点にセット camera.lookAt(new THREE.Vector3(0,0,0)); // 滑らかにカメラコントローラーを制御する const controls = new OrbitControls(camera, document.body); controls.enableDamping = true; controls.dampingFactor = 0.2; //光源 const dirLight = new THREE.SpotLight(0xffffff,1.5);//color,強度 dirLight.position.set(-200, 300, 300); dirLight.castShadow = true; scene.add(dirLight); //レンダラー renderer = new THREE.WebGLRenderer({ alpha: true, antialias: true }); renderer.setClearColor(new THREE.Color(0xffffff)); renderer.setSize(window.innerWidth, window.innerHeight); renderer.shadowMap.enabled = true; //★3に続く |
3Dモデルを、FBXLoaderを使って読み込み、シーンに追加する
次に表示する3Dモデルを読み込みます。
3Dモデルのファイルは、HTMLファイルと同じ階層に置いておきます。
3Dモデルの読み込み
1 2 3 4 5 6 7 8 9 10 11 12 13 14 15 16 17 18 19 20 21 22 23 24 25 26 27 28 29 30 31 32 33 34 | //★3続き //fbxファイルの読み込み const loader = new FBXLoader(); loader.load( 'Martelo 2.fbx', function ( object ) { object.scale.set(1, 1, 1) //シーン内の特定のオブジェクトのアニメーション用のプレーヤー(アニメーションの調整) mixer = new THREE.AnimationMixer( object ); //Animation Actionを生成 const action = mixer.clipAction( object.animations[ 0 ] ); //ループ設定(1回のみ) //action.setLoop(THREE.LoopOnce); //アニメーションを再生する action.play(); //オブジェクトとすべての子孫に対してコールバックを実行 object.traverse((child)=>{ //影を落とすメッシュに対して、Shadowプロパティーを有効 if(child.isMesh){ child.castShadow = true; child.receiveShadow = true; } }); scene.add( object ); }); //★4に続く |
上記コードを少し解読します。
3Dモデルの.fbxを読み込むには、FBXLoaderを使用します。
公式のチュートリアルがあるので、まずは3Dモデルのみ読み込んでみるとわかりやすいかもしれません。(アニメーションなし)
参考:https://sbcode.net/threejs/loaders-fbx/
const fbxLoader = new FBXLoader()
fbxLoader.load(
’ファイル名.fbx’,
(object) => {
scene.add(object)
},
(xhr) => {
console.log((xhr.loaded / xhr.total) * 100 + ‘% loaded’)
},
(error) => {
console.log(error)
}
)
※コメント部分は分かりやすいように非表示にしています。
※チュートリアルのように(全体のコードも完成させて)読み込みができると、アニメーションしない3Dモデルが表示できました。
コードに戻ります。
アニメーションを再現するには、Animation Mixerを使用します。
Animation Clip、Animation Action を使って、動きを再現できるようにします。
Animation Mixer
保存されたデータは、アニメーションの基礎のみを形成します。
実際の再生は、AnimationMixerによって制御されます。
これは、アニメーションのプレーヤーとしてだけでなく、複数のアニメーションを同時に制御してブレンドおよびマージできる実際のミキサーコンソールのようなハードウェアのシミュレーションとして想像することができます。
引用元:https://threejs.org/docs/#manual/en/introduction/Animation-system
Animation Mixerは再生の制御に使うのね。
Animation Actions
AnimationActionsは、AnimationClipsに保存されているアニメーションのパフォーマンスをスケジュールします 。
引用元:https://threejs.org/docs/#api/en/animation/AnimationAction
AnimationClip
AnimationClipは、アニメーションを表す再利用可能なキーフレームトラックのセットです。
引用元:https://threejs.org/docs/#api/en/animation/AnimationClip
AnimationClipはアニメーションデータみたいな感じかな。
「animations」という名前の配列に格納されるみたい。
clipAction
渡されたクリップのAnimationActionを 返します。
引用元:https://threejs.org/docs/#api/en/animation/AnimationMixer.clipAction
3Dモデルにアニメーションをさせてたいので、チュートリアルのFBXアニメーションと上記を参考に記載しました。
参考:https://sbcode.net/threejs/fbx-animation/
上記のコードでいう、
1 2 3 4 5 6 7 8 9 10 11 12 13 14 15 16 | //アニメーション用のプレーヤー(アニメーションの調整)の作成 mixer = new THREE.AnimationMixer( object ); //Animation Actionを生成(クリップ(アニメーションデータ)を指定) const action = mixer.clipAction( object.animations[ 0 ] ); //ループ設定(1回のみ設定する場合) action.setLoop(THREE.LoopOnce); //アニメーションを再生する action.play(); //シーンに追加する scene.add( object ); |
の部分です。
3Dモデルの読み込み、アニメーションの設定ができたら、HTMLに書き出します。
アニメーションを更新し、レンダラーを呼び出す
続きのコードです。
1 2 3 4 5 6 7 8 9 10 11 12 13 14 15 16 17 18 19 20 21 22 23 24 25 26 27 28 29 30 31 32 33 34 35 36 37 38 | //★4続き //レンダラー実行関数 function render() { renderer.render(scene, camera) } //リサイズ処理 window.addEventListener( 'resize', onWindowResize ); function onWindowResize() { camera.aspect = window.innerWidth / window.innerHeight camera.updateProjectionMatrix() renderer.setSize(window.innerWidth, window.innerHeight) render() } //アニメーション処理 function animate() { //グローバルミキサー時間を進め、アニメーションを更新 if (mixer) { mixer.update(clock.getDelta()); } controls.update() render() //次のレンダラーを呼び出す requestAnimationFrame( animate ); } animate() //★5に続く |
書き出したレンダラーをHTML上に追加する
HTMLに追加します。
1 2 3 4 5 6 7 | //★5続き //読み込んだシーンが暗いので、明るくする renderer.outputEncoding = THREE.sRGBEncoding; document.getElementById("WebGL-output").appendChild(renderer.domElement); |
animate()の関数を書き忘れたり、HTMLに書き出しを忘れると、表示されないよ。
(当たり前ですが・・・たまに書き忘れる)
全体のコード
全体のコードです。
サーバ―にあげないで確認したい場合はクロスオリジンエラーが出るので注意が必要です。
1 2 3 4 5 6 7 8 9 10 11 12 13 14 15 16 17 18 19 20 21 22 23 24 25 26 27 28 29 30 31 32 33 34 35 36 37 38 39 40 41 42 43 44 45 46 47 48 49 50 51 52 53 54 55 56 57 58 59 60 61 62 63 64 65 66 67 68 69 70 71 72 73 74 75 76 77 78 79 80 81 82 83 84 85 86 87 88 89 90 91 92 93 94 95 96 97 98 99 100 101 102 103 104 105 106 107 108 109 110 111 112 113 114 115 116 117 118 119 120 121 122 123 124 125 126 127 128 129 130 131 132 | <body> <!-- Output --> <div id="WebGL-output"> </div> <!-- Javascript code--> <script type="module"> import * as THREE from'https://unpkg.com/three@0.126.1/build/three.module.js'; import { OrbitControls } from 'https://unpkg.com/three@0.126.1/examples/jsm/controls/OrbitControls.js'; import { FBXLoader } from 'https://unpkg.com/three@0.126.1/examples/jsm/loaders/FBXLoader.js'; let camera; let scene; let renderer; let model; let clock = new THREE.Clock(); let mixer; init(); // 読み込み function init() { //シーン scene = new THREE.Scene(); //中心線の追加 scene.add(new THREE.AxesHelper(5)) //カメラの作成 camera = new THREE.PerspectiveCamera(45, window.innerWidth / window.innerHeight, 0.1, 5000); //カメラセット camera.position.x = 200; camera.position.y = 300; camera.position.z = 500; //原点にセット camera.lookAt(new THREE.Vector3(0,0,0)); // 滑らかにカメラコントローラーを制御する const controls = new OrbitControls(camera, document.body); controls.enableDamping = true; controls.dampingFactor = 0.2; //光源 const dirLight = new THREE.SpotLight(0xffffff,1.5);//color,強度 dirLight.position.set(-200, 300, 300); dirLight.castShadow = true; scene.add(dirLight); //レンダラー renderer = new THREE.WebGLRenderer({ alpha: true, antialias: true }); renderer.setClearColor(new THREE.Color(0xffffff)); renderer.setSize(window.innerWidth, window.innerHeight); renderer.shadowMap.enabled = true; //fbxファイルの読み込み const loader = new FBXLoader(); loader.load( 'Martelo 2.fbx', function ( object ) { object.scale.set(1, 1, 1) //シーン内の特定のオブジェクトのアニメーション用のプレーヤー(アニメーションの調整) mixer = new THREE.AnimationMixer( object ); //Animation Actionを生成 const action = mixer.clipAction( object.animations[ 0 ] ); //アニメーションを再生する action.play(); //オブジェクトとすべての子孫に対してコールバックを実行 object.traverse((child)=>{ if(child.isMesh){ child.castShadow = true; child.receiveShadow = true; } }); scene.add( object ); }, (xhr) => { console.log((xhr.loaded / xhr.total) * 100 + '% loaded') }, (error) => { console.log(error) } ); //レンダラー実行関数 function render() { renderer.render(scene, camera) } //リサイズ処理 window.addEventListener( 'resize', onWindowResize ); function onWindowResize() { camera.aspect = window.innerWidth / window.innerHeight camera.updateProjectionMatrix() renderer.setSize(window.innerWidth, window.innerHeight) render() } //アニメーション処理 function animate() { if (mixer) { mixer.update(clock.getDelta()); } controls.update() render() requestAnimationFrame( animate ); } animate() //読み込んだシーンが暗いので、明るくする renderer.outputEncoding = THREE.sRGBEncoding; document.getElementById("WebGL-output").appendChild(renderer.domElement); } </script> </body> |
たったこれだけなのに、かなり躓きました・・・(;’∀’)
無料で3Dモデルを使用させてくれるMiXamoとそれを表現できるthree.jsってすごい・・・!
引き継き勉強していきたいと思います!
ここまで読んで下さりありがとうございます。
<学習本>
<あわせて読みたい>
導入の記事↓
広告


![Three.js [axisHelper、gridHelper ]ヘルパーを使い、グリッド平面を表示する。](https://notetoself-dy.com/wp-content/uploads/2021/12/grid-200x160.jpg)


